Hornindalsøl batch 3 and 4 – the process is getting better

My third and fourth batches of Hornindalsøl are a continuation of my struggle to master this interesting Norwegian farmhouse ale. This time I was also in a hurry as I had promised my good friend Kaveh to provide beer for his PhD-defence dinner. Actually, I had already made beer for the dinner, but as I explained in my previous post (https://sigurdjakobsen.no/?p=334), I was not happy with the result.

When I started planning these batches the alcoholic taste of the previous beer had not yet faded. Since, I was not sure what caused this taste I decided to order new Hornindalskveik to use for my next batch. While waiting for the Hornindalskveik, I planned to make Vossaøl. However, to my surprise the Hornindalskveik arrived quickly, and I decided to give it Hornindalen one more go. The original plan was to afterwards make a Vossaøl. Later I learnt that Vossaøl needs 4 days to ferment, which in my case was way too long. Consequently, I made two batches of Hornindalsøl for the dinner.

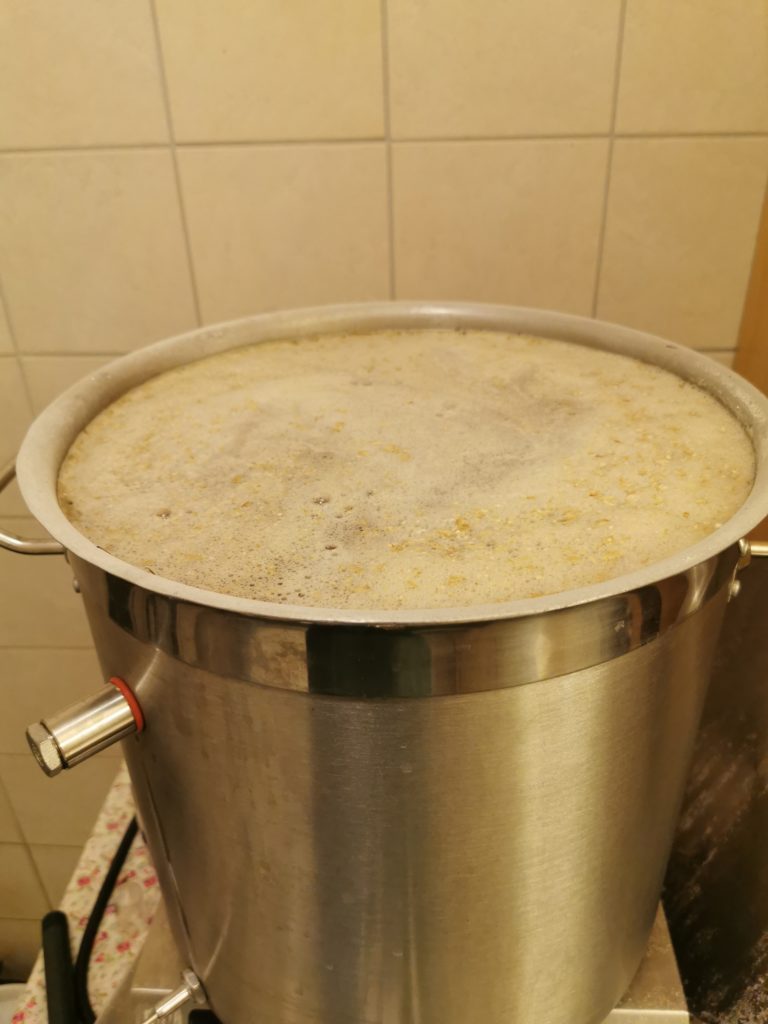
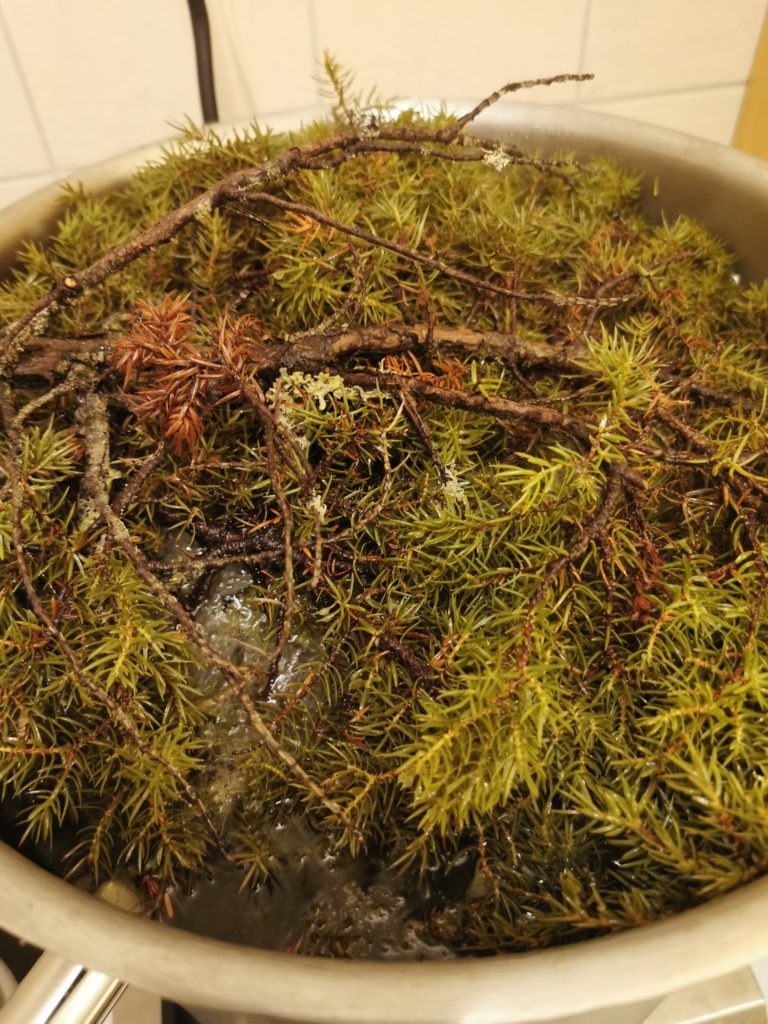
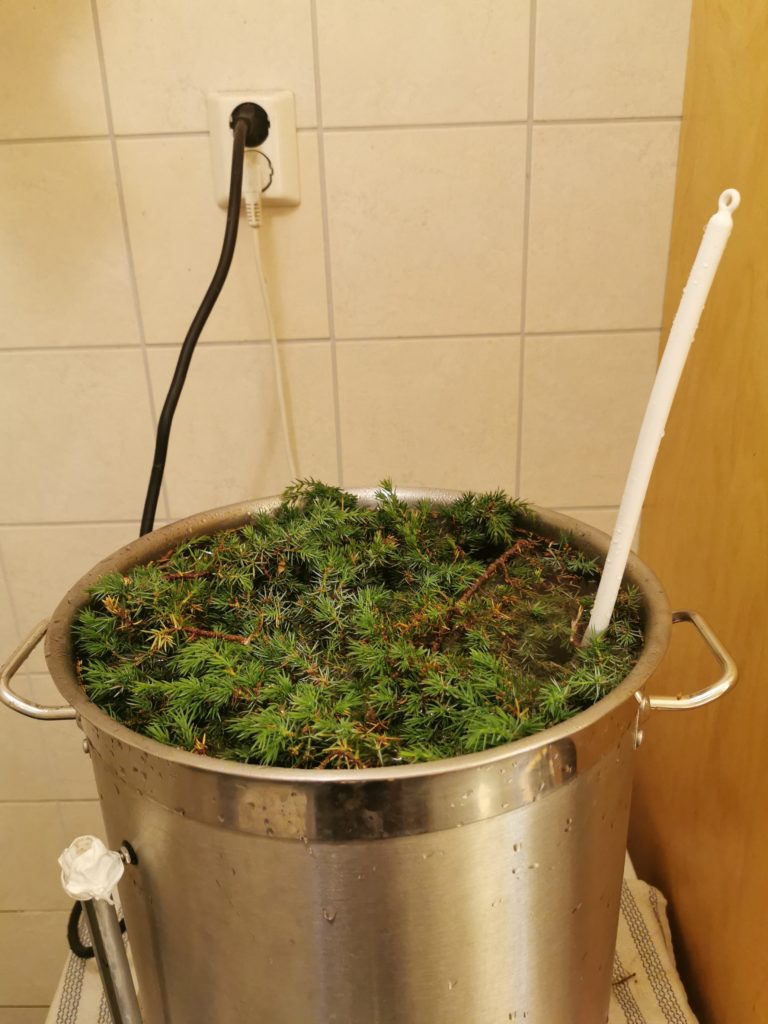
Several things went wrong for my last batch, and among one of them was the problem of the stuck mash. In my process for brewing this beer (explained https://sigurdjakobsen.no/?p=309 here), I do everything in one pot. This is to reduce the risk of contamination. However, it increases the risk of getting a stuck mash. To prevent the stuck mash I bought a mash bag and lifted the bag a bit everytime the mash got stuck. I put the bag inside the pot before adding junipers and water to ensure that it got properly disinfected.

Boiling junipers in a bag

Another change from my previous batches were that I misplaced my hops bag. When tapping the wort to the fermentor, it’s supposed to be filtered through a bag of hops. This hops filter together with a juniper filter will make the tapping slower, and almost serve as a separate mashing step (Garshol 2016). This time I just threw the hops in with the rest of the mash, since I already had the mash bag.

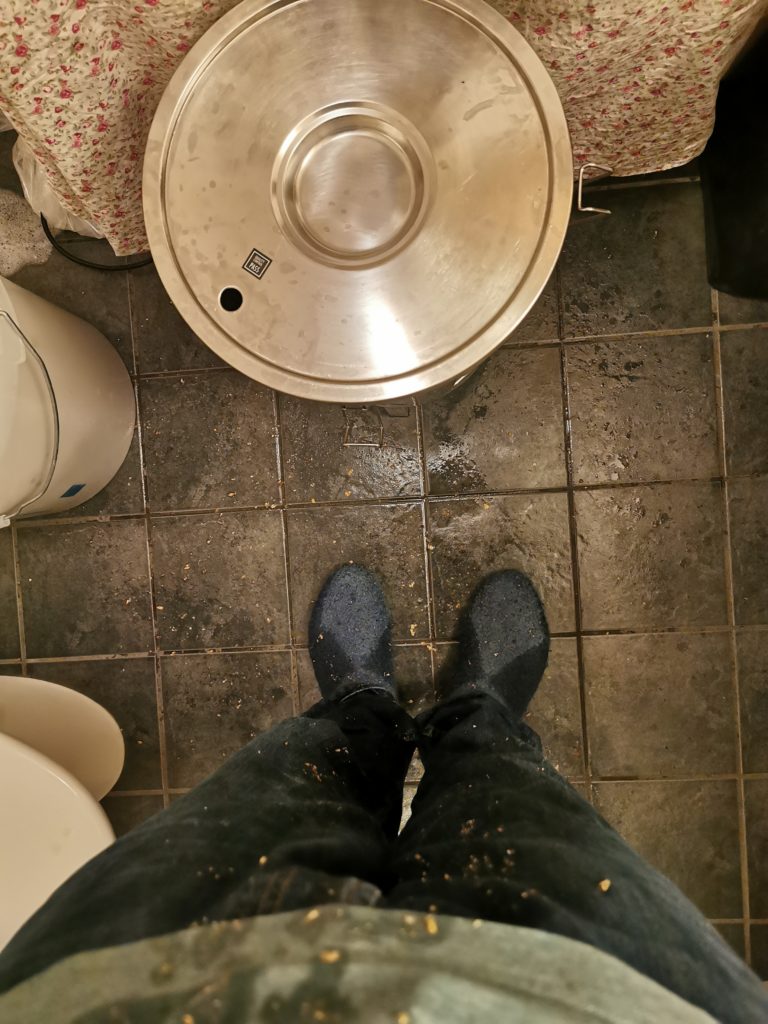
For the third batch, I was rather unlucky. I had forgotten to close the valve of the fermentor. I therefore, lost a lot of nice wort. In fact, I suspect I lost some of the wort with the highest gravity. Moreover, the beer took forever to cool down, so I asked my girlfriend to pitch the yeast the next day. For my fourth batch, I finally took to my senses and did what had to be done. Namely, I carried the fermentor out into the freezing cold. It was a heavy an annoying task, but the wort cooled down much faster.

From the plot above one can see that the third batch did not reach the desired gravity. I think that apart from spilling some wort and how I cooled it, the rest of the process was the same. The difference in the gravity is therefore likely due to the spilled wort. Just like my first attempt with Hornindalsøl the third batch fermented very slow. I think this may be due to yeast having to wait in room temperature a while before pitching. It could also be a result of high temperature while it was being sent as a letter by the post. In any case it’s not a problem if the fermentation has not finished, it can easily finish on a keg.

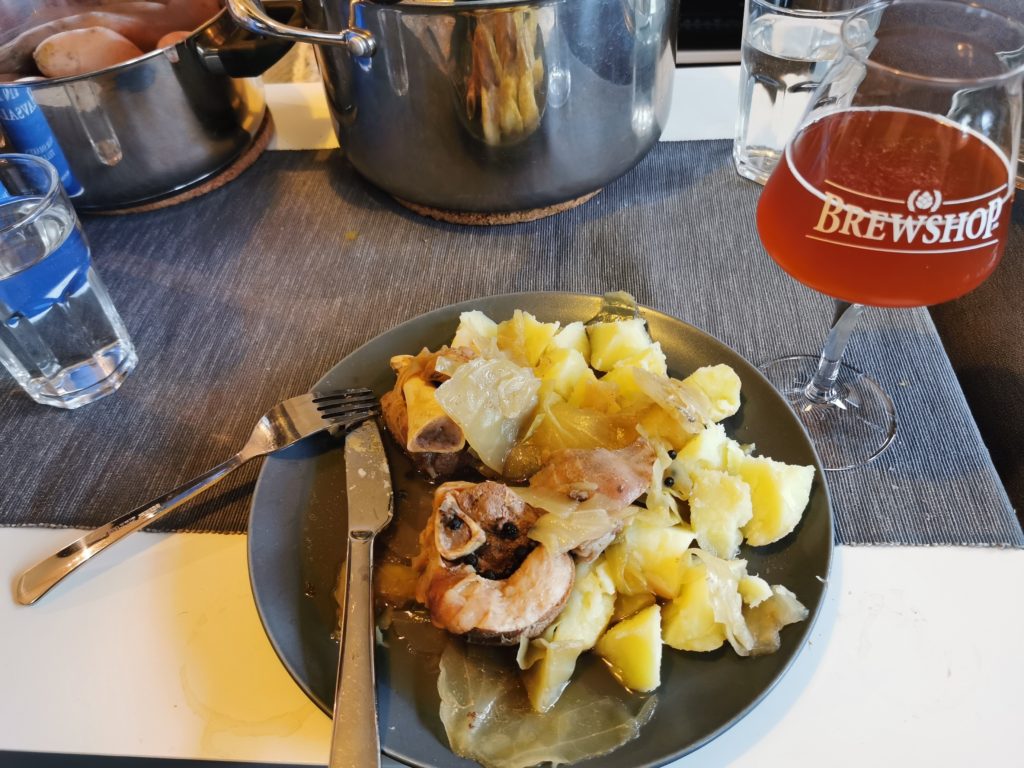
Luckily, the fourth batch finished right on time for the dinner. It even reached the correct FG, and was consumed happily by the dinner participants before we started on the third batch. I think, I have finally figured out how to make this beer. For my next post, I will try to summarize my process for making this beer together with the lessons I have learned.

A glass from my third Hornindalsøl batch. The foam is probably not according to the style

Reference

Garshol, Lars Marius. (2016 ). Gårdsøl: Det norske ølet. Cappelen Damm. ISBN 978-82-02-51746-5

Hornindalsøl take 2 – fermenting at the speed of sound

My good friend Kaveh is finally defending his PhD in electric power engineering. To celebrate this joyous occasion, I offered to brew some farmhouse ale for his PhD party. Strictly speaking, we do have to call it a “dinner” to comply with the image of lab coat wearing nerds that the department wants. Of course we are lab coat wearing nerds, but we also like to party. Sadly, due to the current corona situation it will actually be just a dinner, but with beer. So, a standard dinner.

Anyways, let’s proceed to the beer brewing. I was struggling to determine if I should first make a batch of Hornindalsøl (described in https://sigurdjakobsen.no/?p=309) or a Vossaøl (https://sigurdjakobsen.no/?p=29). Since the Hornindalsøl is a raw ale it would make sense to make it last. However, during my last attempt it needed more than a week to fully ferment. Consequently, it seemed a bit risky to make it right before the “dinner”. Luckily, on the day of brewing I overslept and therefore didn’t have time to make Vossaøl, something that made my choice easy.

Vossaøl and Hornindalsøl contain more or less the same ingredients. That is 4kg pilsner malt, 4kg pale ale malt, juniper and 100g Saaz hops for Vossaøl and 50g Saaz hops for Hornindalsøl. The steps needed to produce both beers are easy, but as will soon be revealed …. mistakes were made.

The first step is to boil juniper to make what we in Norway call einerlog. I let it boil for 15 minues together with my wooden spatula to make sure everything got sterilized.

After the boiling I had to wait for the einerlog to cool down. This process was made more exciting when the main fuse to my apartment tripped. This has never happened to me before and I didn’t know where the main fuse was. Luckily my good neighbor who is also an electrician knew where in the basement to find it.

I poured in the malt when the temperature was around 80° C. This made the temperature drop to 75°C, which was slightly above the target of 74° C. After one hour it had fallen to 65° C, which means I should insulate better next time. Alternatively, I could add some low heat. Before starting the mashing I added hops in a hops bag in front of the outlet. To keep it in place I used some juniper branches. While adding the malt I also tapped some einerlog to use for the sparging. Next time I think I will tap some liters before I add the malt, to make sure it is pure einerlog, and not mixed with the malt.

Right after adding the malt.

The Hornindal beer is a raw ale. This means that there is no boiling after the mashing. Instead it’s poured directly from the mash tun(Also the pot for boiling the juniper in my case) into the fermentor. Sadly, I was unlucky this time and ended up with a stuck mash. I managed to solve it, but as can be seen below it came at a cost.

Result of the beer getting unstuck

As with my previous attempt of making Hornindalsøl the beer needed a lot of time cooling down to fermentation temperature. The solution this time was to pitch the yeast in the morning. However, the temperature was still a bit high when I pitched the yeast. From the plot below the result of this can be seen. The temperature quickly rose, and the beer finished fermenting in less than 24 hours.

Due to the fast fermentation, I was skeptical when tapping the beer. Sadly, it turned out it wasn’t for nothing. The beer smelled strongly of alcohol and didn’t taste too good. I feared the worst, but I let the beer settle for some days and the taste of alcohol faded. It’s definitively not an amazing beer, but it’s also not bad. In fact I am having a glass right now.

A picture of the glass of beer I am currently drinking

Although, I am not too happy with this beer, some lessons were learned. Next time I will definitively wait for the pitching temperature to fall lower. I think this high temperature may have contributed to the alcoholic taste of the beer. In addition, I will try to ensure a correct mashing temperature and avoid the mash getting stuck.

Since this beer is not worthy the achievements of Doctor Kaveh, a new batch had to be made. Somehow, it ended up being two good batches. How I managed that, is a story for next time.

Hornindalsøl a raw ale

My latest beer was my first raw ale. This means that it is not boiled after the mashing. Obviously, it is nice to save the time spent boiling, but it increases the risk for contamination. Moreover, it turns out that I still ended up spending a lot of time for the brewing.

The beer I was making was an attempt of recreating the beer made in Hornindal as described in the awesome book “Gårdsøl” by Lars Garshol. Since, I don’t have a large farm and room for lots of equipment I decided to modify the process a bit. Both to make it easier for myself and to reduce the risk of contamination.

My idea was that the less equipment I used and the less I transferred the beer around, the less the risk of contamination would be. I therefore decided to do the mashing in the pot used for boiling the junipers. Unfortunately, I had thrown away my bag for the brew in the bag procedure. To my surprise and delight, that was not a problem at all. My process and recipe was as follows:

  1. Fill the pot with juniper and bring it to a boil.
  2. Boil for 15 minutes. Make sure to put things needed for the rest of the process inside the boiling einerlog (juniper tea) to disinfect it.
  3. Take out most of the juniper and wait for the temperature to drop to mashing temperature . Some Juniper is left to function as a filter when the wort is tapped.
  4. Before adding the malt put 50 grams of Saaz hops in a disinfected bag in front of the wort outlet. This will be an extra filter in addition to the juniper.
  5. Add 4kg of pilsner malt and 4kg of pale ale malt. The mashing temperature is 74° C and the duraiont is one hour.
  6. Tap the wort and wait for the temperature to reach 38° C and add the kveik. Fermentation should be done in two days.
Boling the einerlog

Of course things did not go as planned. Everything was fine until I started the mashing. I added the malt when the temperature had dropped to 77° C. To my surprise this made the temperature go all the way down to 70° C. In a response to this I switched on the plate to heat the mash. However, I think the temperature measurement was a bit off. Because the temperature quickly rose to 81° C. At which point I switched off the plate and crossed my fingers.

The next surprise was when I was going to add the yeast. Since I hadn’t disinfected the wort cooler the temperature fell way too slowly. I therefore decided to go to bed and drop in the yeast before going to work. Due to this the kveik ended up being out of the fridge for more than 15 hours before I finally added it to the wort. This came on top of it having been transported for 2 days in the post before arriving in my post box. I could only pray it was as robust as rumors would have it.

I am not sure if it was the treatment of the yeast or the high mashing temperature, but as can be seen from the plot above, the kveik did not provide the fast fermentation it’s known for. In the end I had to tap the beer at an SG far above the target of 1.018, to serve it to friends coming over. Despite the trouble the end result was very good and got lots of praise. Although, we all agreed it was a bit sweet.

Beer ready for consumption

Luckily, the story of this beer does not stop here. The next weekend I wanted to have a sip of the beer. When I started tapping, I got quite surprised to see that the keg pressure had increased. I checked the CO2 regulator and it was off. My hopes were high as I eagerly took a sip. To my delight my suspicion was correct, the beer had fermented in the keg. What I now had in my hand was a beer with an amazing balance between exotic fruity and malty taste. The overly sweetness was gone and the beer was now a perfect summer ale. Due to the pressure the beer had also been nicely carbonated. I know farm house ales should not be this carbonated, but I really don’t care as I am quite certain this is the best beer I have made so far.

I top harvested some of the yeast during the fermentation and I am very eager to see if I can recreate this amazing beer. With all my mistakes it may turn out to be challenging, but I will try my best.

My best beer so far

Vossaøl or kveik take 2

For my second batch of Vossaøl I decided to try the kveik I harvested from the previous batch. According to what I read the brewers making the beer in the traditional way taste the kveik to check if it is still good. I therefore poured myself a small glass of beer from the kveik glass. The beer tasted amazing, so I concluded that the kveik was still good.

Glass of beer from the jar with harvested kveik

I closely followed the procedure I previously described in https://sigurdjakobsen.no/?p=29 . The only difference this time was that I used the kveik I harvested when making the previous batch. To add the kveik I shook the jar with the kveik so that it got mixed with the beer before pouring it in.

I was probably a bit impatient while waiting for the beer to cool down. As can be seen from the chart over the temperature and fermentation the temperature was probably above 40° C when I added the kveik. Luckily it is quite robust so it seemed to handle it well. However, I sat almost an hour with the fermentor on my terrace just to make sure.

In the end even though I had the minor issue with the fermentation temperature the beer turned out amazing. I also installed a clear beer draught system in my keg, giving me nice and clear beer for my fårikål.

Beer and fårikål

Søyådalen rundt

Då sommarferien gjekk mot slutten oppdaga eg til min store skrekk at magen var vorten større. Noko, som passa svært dårleg sidan Bærumsbrede just hadde bydd opp til dans på jotnanes steindekte golv. For å varma opp til dansen spurde eg om ein oppvarmingsrunde i trollas steinete heim.

Bæreumsbrede er glad i lange gåturar og han hadde lese om folk, som hadde gått Trollhøttatraversen etterfulgt av Pekkhøtta. For å slå desse turan foreslo han at me også tok turen innom Blånebba. Eg likte forslaget, men eg tenkte at då me fyrst var i gong kunne me like godt feia over heile dalen. Me andre ord så foreslo eg at me tok turen innom Ørnhammaren, Brokkelnebba, Moslættknubben, Snøfjellet, Seterknubben, Indre Fauskånebba og Fauskånebba. Tilsamans planla me å besøkja 9 fjell pluss dei tri toppane på Trollhøtta, noko som gav oss ein 12 fjellstur. Eller som Bærumsbrede påpeika seinare, ein 13 fjellstur sidan Trollhøtta har fire toppar.

Turen vart omstendeleg logga både med pulsklokke og turgps. Sjølv om eg ikkje fekk skrudd på turgpsen før me hadde gått 200 metar så bør ein kunna forstå seg på loggen. For stravafantastane så finst det ei lenke til stravaktiviteten nedst på sida.

Total distance: 27426 m
Total climbing: 3084 m
Total descent: -3103 m
Total time: 09:25:01
Download file: Track_2020-08-04 194439.gpx

Opp til Ørnhammaren gjekk det ingen opplagt sti så me fortsatte innover grusvegen frå parkeringsplassen til skogen vart litt opnare etter å ha kryssa Utgardsbekken. Her i frå så var det berre å kava seg opp i gjennom skogen til me kom opp av skoggrensa. Etter dei siste klyva opp til toppen fekk me eit fint utsyn utover store delar av resten av løypa. Ned frå Ørnhammaren gjekk det stort sett greitt. Det einaste hinderet var litt sikksakkgåing ned ei rampe mellom nokre sva, som bøy opp til fin rissklatring. Dessverre hadde me ikkje med utstyr til å testa rissklatringa på ein sikker måte så me nøgde oss med å gå rampa.

Sikksakkrampa ned frå Ørnhammaren.

Vidare til Brokkelnebba og Moslættknuten gjekk det veldig fint. Klyvinga ned var derimot ein av dagens mest utfordrande, utan at det seier så mykje. Opp til Snøfjellet var veldig enkelt etterfulgt av ein fin bakke for roleg jogg nedover. For å koma heilt ned frå Snøfjellet måtte eit par enkle klyv til og likedan for å koma seg inn i bakken opp mot Seterknubben.

Klyveparti ned frå Moslættknuten

Frå Seterknubben openberer traversen vidare seg. Den ser like lite fryktingytande ut, som han faktisk er, men det er bratt nok til at ein del vil føla på høgda. For dei modige kjem det etterkvart eit lite bulder midt på traversen, som enkelt kan omgås til høgre. På grunn av store snømengdar på vintaren og ein kald vår bydde traversen også på morosam snøspringing. Til å byrja med var eg ganske skeptisk sidan eit fall ville gje ein utriveleg rutsjetur ned i bratte sva eller steinrøys. Bærumsbrede var derimot frå seg av glede og viste meg ufeilbarleg teknikk med ein fot på kvar side av eggen. Dette var meir enn nok til å få fart på meg også og snart sprang me begge ned med ein fot på kvar side av den snødekte eggen.

Opp til Pekkhøtta var det litt brattare og meir steinete enn kva me opplevede på dei andre fjella. Lite visste me at dette var ingenting mot den bratte og lause steinura, som venta oss ned frå Pekkhøtta. Me valde å gå for den ryggen av Pekkhøtta, som vende rett mot Blånebba, men då me stod midt i det vurderte me om det var rette valet. Etter ein kort diskusjon kom me fram til at det var einaste valet, som gav meining med tanke på kor me skulle vidare.

Pekkhøtta overraska oss også med å vera nokre metar høgare enn det kartet tilsa på grunn av ei stor snøfonn. Det var ikkje nok til å vera ein 1400metarstopp, men i fylgje GPSen var toppen to metar høgare enn dei 1396 den skal måla. Ein skulle nok ikkje ha vore på toppen mange veker før for å nå 1400 metars høgd.

Pekkhøtta med den kvite toppfonna

Opp til Blånebba var det teknisk veldig enkelt, men no byrja beina å klaga litt. I tillegg så kom skodda sigande inn dalen og tok etterkvart frå oss utsikten. På toppen var me verkeleg inne i skoddehavet, men på veg ned starta det å letta på asustida av ryggen. Dette gav ein vakkar trolsk stemning med den vestre sida av ryggen i skodda og fin utsikt mot aust.

For å koma oss til Indre Fauskånebba fulgte med stien frå Blånebba til skaret mellom Blånebba og Indre Fauskånebba. Der i frå var det lett opp for å nå toppen. Etter toppen fulgte me ein brei og fin rygg før me starta turen nedover. Nedstigninga vart avbroten av litt klyving ned nokre skrentar før, me gjekk over i lett jogg. For å nytta helninga som Bærumsbrede kalla det.

Vidare til Fauskånebba var det veldig enkelt. Nedover var me litt i tvil, men planen var å sikta mot ein skogsveg me hadde sett frå andre sida av dalen. For å nå denne var planen å fylgja ryggen ned frå Fauskånebba, som sett frå andre sida av dalen. Dette var lettare sagt enn gjort. Me hadde ikkje tatt høgde for at me skulle finna store snøfelt som lot oss ta mange hundre høgdemetar i eit stort jafs. Einaste ulempen var at snøfelta førte oss ut av kurs. Etter å ha travesert tilbake i retninga me trudde me skulle vart me plutseleg møtt av ein bratt dalside med fleire skrentar. Bærumsbrede meinte stien var litt opp på andre sida av dalen og at me kunne halda høgda rundt. Heldigvis vart me samde om å kava oss ned mellom skrentane for å fylgja dalen mot Søyådalen. Til alt hell fann me ein smal sti her, som leida oss rett til skogsvegen. Der i frå var det lett jogging ned til bilen.

Nede ved bilen var med begge samde om at det hadde vore ein fin tur. Me levde også godt i trua om at me var noke av dei fyrste til å ha gått turen. Juan av Patagonia, satte derimot ein stoppar for dette håpet ved å påpeika at han hadde sprunget bortimot same turen året før. Heldigivs hadde han sprunget ein bitte litt kortare variant og ikkje så mykje raskare.

Det vart ikkje nokon 7 fjellstur slik som dei kule stadene har, men eg håper at folk let seg inspirera til å prøva denne fine 13 fjellsturen.

My first traditional beer with kveik

I first heard about kveik while on a researcher exchange in France in 2018. It was on a list of top ten things to try while visiting Western Norway. As a beer enthusiast, I was happy to learn that Norway had something more to offer than standard pilsner and micro breweries. Don’t get me wrong I love the micro breweries, and I have enjoyed a fair share of pilsners. However, it is nice to try something that is unique for Norway.

Kveik ready for the next batch.

Kveik is a very interesting yeast. It produces good beers at temperatures up to 40°C (Fermentation temperature). Due to the high temperature it is also very fast and you can have a beer ready in a couple of days. Moreover, the yeast gives very interesting flavors. For instance Sigmund’s Voss Kveik, which is the one I use, has been said to give a taste similar to orange peel. If i had to describe my beer I would say it tasted something in between a punch and a fruity IPA. Although, the best would be to just try a beer made from a good recipe. I have previously tried some beers with Kveik bought at the liquor store, but they tasted more like normal beers. A very good source for those interested in learning more about Kveik is the blog http://www.garshol.priv.no/blog/.

The recipe

I got the recipe from the book Gårdsøl – det norske ølet. The book is available in both Norwegian and English at http://www.garshol.priv.no/blog/ . It’s my understanding that it’s an adaption of Sigmund’s recipe for home brewer equipment. Sigmund is a Norwegian guy from Voss who does traditional brewing using Kveik. Some may already have guessed that it is also him we have to thank for providing Sigmund’s Voss Kveik. The ingredients for making the beer follows below, shortly followed by the procedure. (In the book he used 80g of hops)

4 kg pilsner malt
4 kg pale ale malt
100g Saaz hops
Sigmund’s Voss kveik
Lots of juniper

Anyone , familiar with beer recipes may see that this looks like a normal recipe. Except for the kveik and the juniper. I myself was surprised to learn that juniper belonged in beers. I have alot of experience of getting rid of junipers and getting itchy red legs from them, but I would never have believed they belonged in a beer. However, as it turns out all traditional Norwegian beer recipes I have read includes junipers. ( I have not read that a many only those mentioned in Garshol 2016, and one from the grandfather of a friend of mine). Interestingly enough, I just read in Brunstad 2019, that ancient Egyptians also used some type of juniper in their beer. I guess junipers has belonged in beers for thousands of years. Hopefully, this will inspire brewers to thin out the junipers growing below some of my favorite climbing routes.

The juniper is used to make some type of tea called einerlog. Log is a Norwegian word meaning the liquid you get when you boil plants in water or the liquid you pour on your malt for the mashing. After this short explanation, it should come as no surprise that the einerlog is poured on the malt instead of hot water.

I also poured myself some einerlog in a glas. It tasted like a nice tea and to my relief I had no allergic reaction, like the one I get from the juniper needles. An example of what the einerlog looked like in my case is given below.

Einerlog ready for consumption

According to the recipe the kettle should be filled to the brim with junipers, without pressing them together. I didn’t find any instructions on how long the branches should be, so I went for the part with most needles. In my case that was 20-30cm. The einerlog should be heated up to 90°C before pouring it on the mash and the mashing starts at 69°C and lasts for three hours. At this point I was confused and I waited until the einerlog reached the mashing temperature. After a closer inspection, it seems that I could have mixed in some cold water to cool it down.

Preparing the einerlog

The mash is also supposed to contain juniper and half of the hops. I am not sure how much juniper to add to the mash, but I added some at the bottom to help filtering the beer. From what I have read juniper is used as a filter in traditional brewing, so this seemed natural.

Juniper as a filter in the mash.

After the mashing the beer should be boiled for 4 hours. This should boil away half of the liquid. I filled my kettle as much as I dared and ended up with around 15 litres of beer. The rest of the hops are added at the last 15 minutes of the boil. Unfortunately, I started a bit late with the brewing. I therefore, decided to go to bed while it was boiling and set the alarm for half an hour before it was done. Maybe a risky move, but I put on the timer on the plate as a safety mechanism.

I was quite sleepy when cooling the beer, so I cooled it too much before adding the Kveik. The starting temperature was at 27.8°C, which is a bit short of the desired 38°. However, as can be seen from the chart below the temperature quickly rose to a nice range. The OG was 1.085 and the FG 1.017, both a bit higher than the targets of 1.080 and 1.014 respectively.

Plot of SG and temperature during the fermentation.
s

I invited some friends over to taste the final product. Despite some of the mistakes I made during the process, they seemed quite happy. In fact much more of the beer than what I had planned for disappeared. Luckily, this gives me a good excuse to try the recipe again with the yeast and experiences I harvested from this attempt.

My first attempt at a traditional beer with kveik.

References

  • Garshol, Lars Marius. (2016 ). Gårdsøl: Det norske ølet. Cappelen Damm. ISBN 978-82-02-51746-5
  • Brunstad Sissel. (2019)- Norsk Ølhistorie: Frå odins skål til i dag. Skald. ISBN 978-82-7959-289-1